How To Whitelist Email Addresses On Gmail, Outlook, and Many More
3 min read
It's interesting to note that Google's email algorithm is highly effective, as less than 0.1% of the messages that land in your Gmail inbox are considered spam. However, there are instances when Google mistakenly categorizes important emails and messages as spam. As a precaution, Google puts more emails into the spam folder, potentially leading to missed critical messages.
To avoid missing important emails, whitelisting email addresses and domains can be the solution. By adding an email to your whitelist, you can effortlessly ensure that important emails are delivered to your inbox and avoid ending up in the spam folder. Whitelisting is a simple process that can help safeguard you from scammers.
How To Whitelist using Desktop Apps
Gmail
1. Log Into Your Gmail and Open Your Settings
After logging in, locate the gear icon situated near your profile picture and click on it. This will trigger a drop-down menu where you can choose the "See all settings" option.
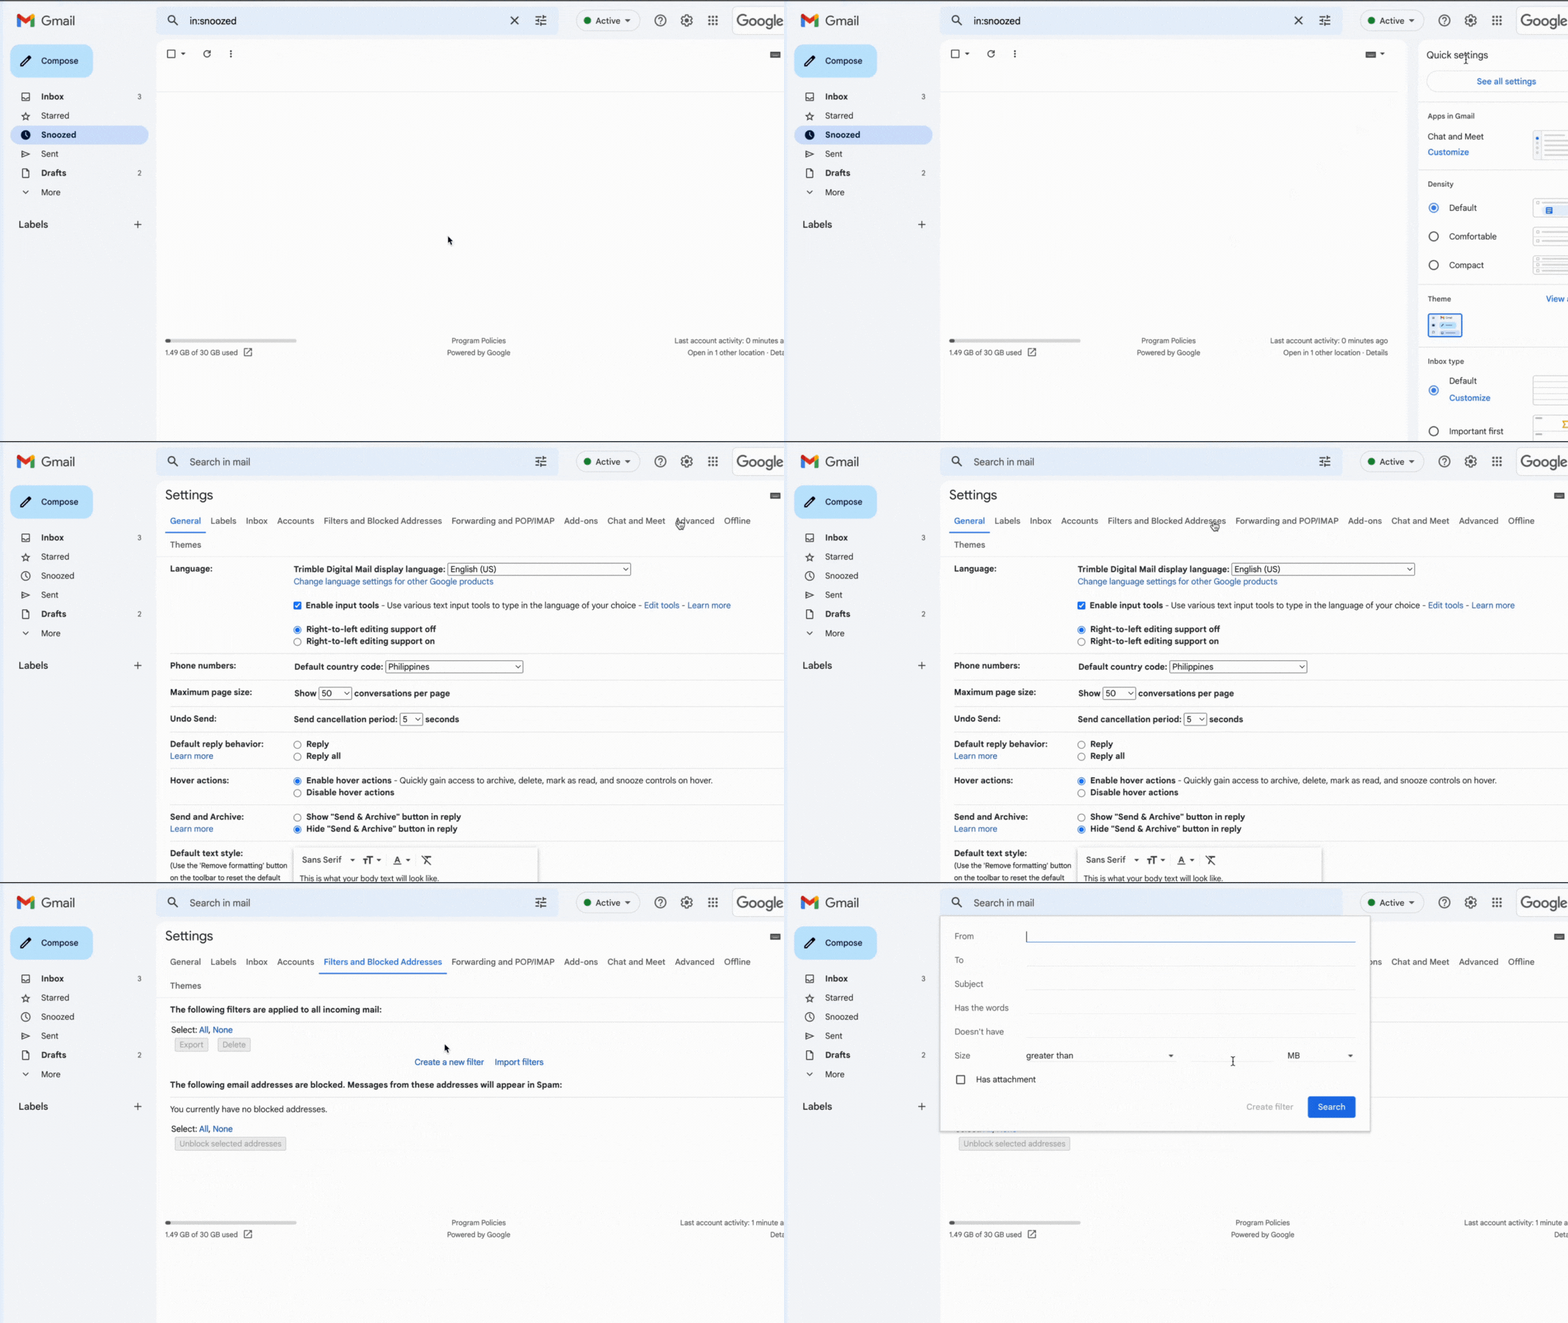
2. Select Filters and Blocked Addresses
Within the settings, you will find a row containing various options. Click on the fifth option labeled "Filters and Blocked Addresses."
3. Create A New Filter
Be sure to scroll down and choose the "Create a new filter" button, located in the center of the page, as shown below.
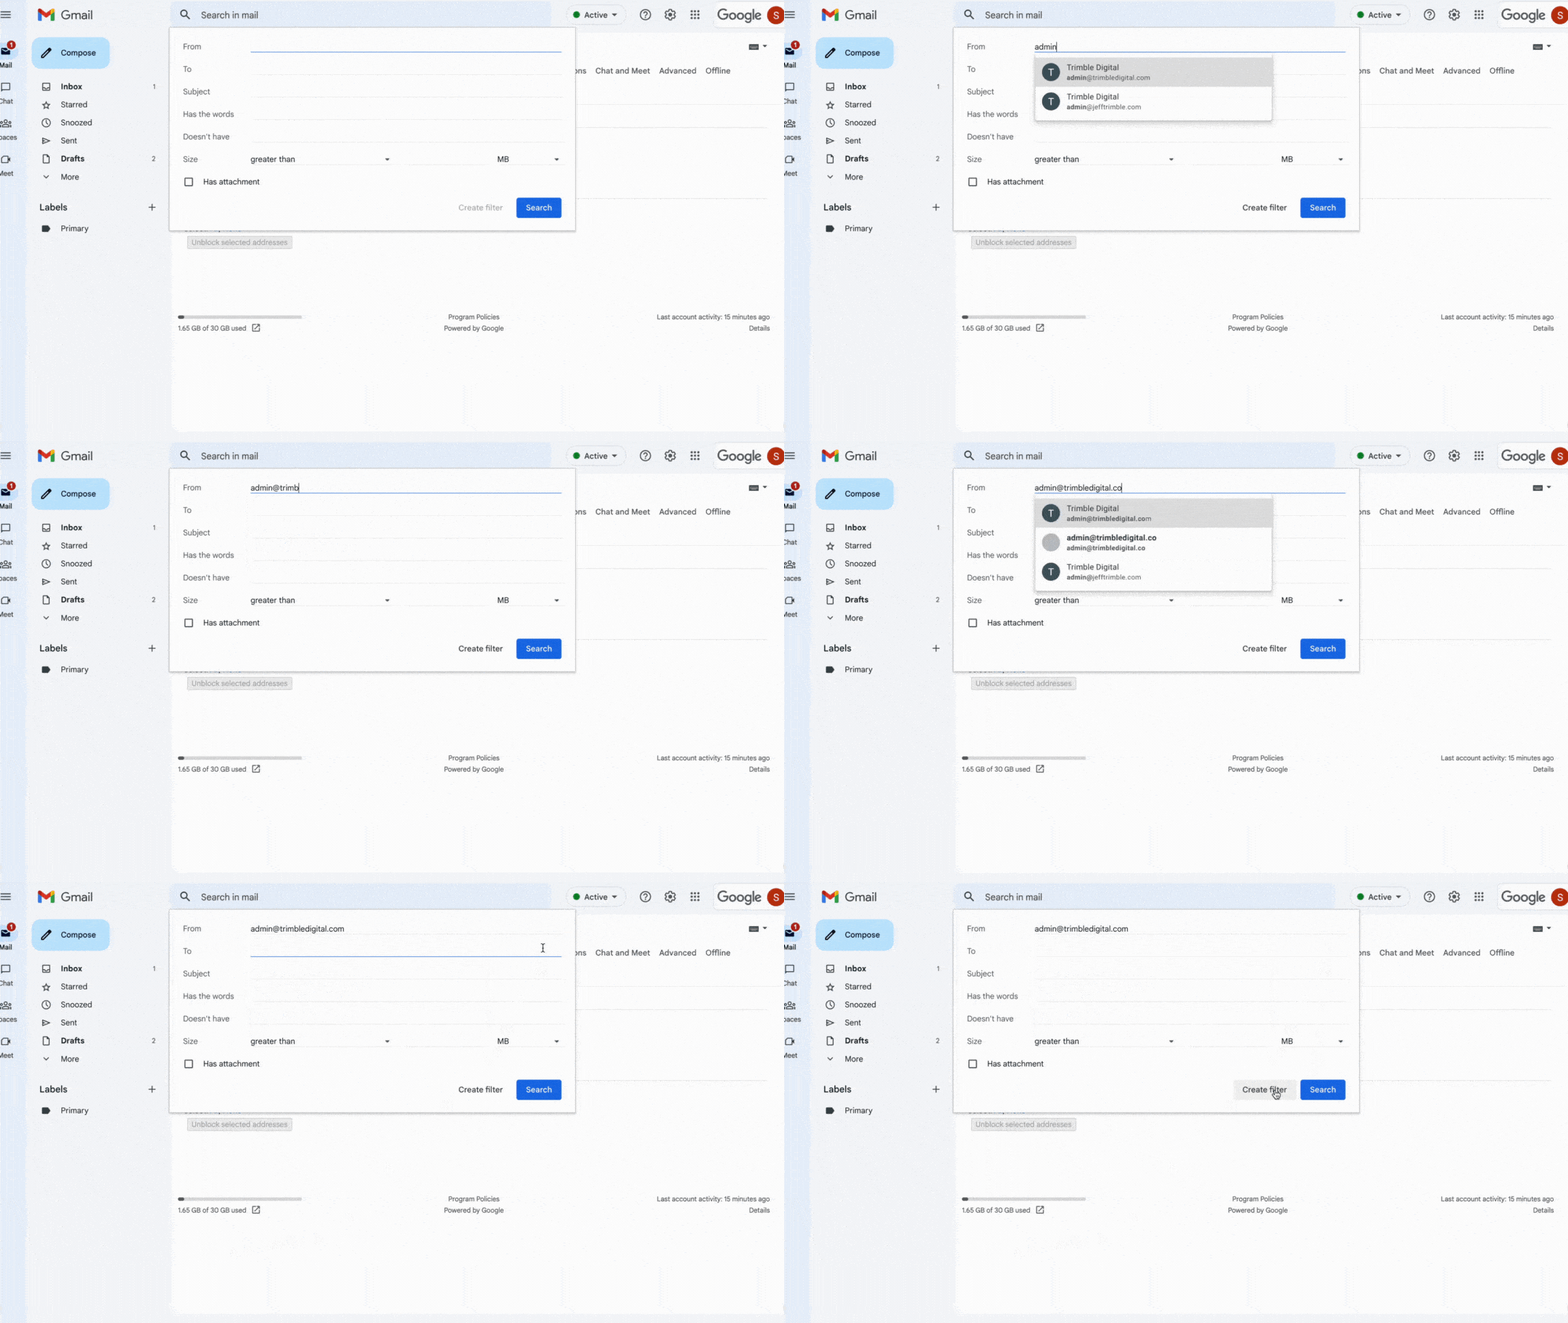
4. Add Your Email Address That You Want To Whitelist
Once you have clicked on the "Create a new filter" button, a pop-up window containing an email address should appear, similar to the one displayed below. Enter the email address that you wish to whitelist next to the "from" line. Once you have entered this information, be sure to select the "Create filter" option.
5. "Never Send It To Spam"
We are nearly done, please ensure that you tick the "Never send to spam" box. After selecting this option, click on the "create filter" button, and voila! The email address has now been successfully added to your whitelist.
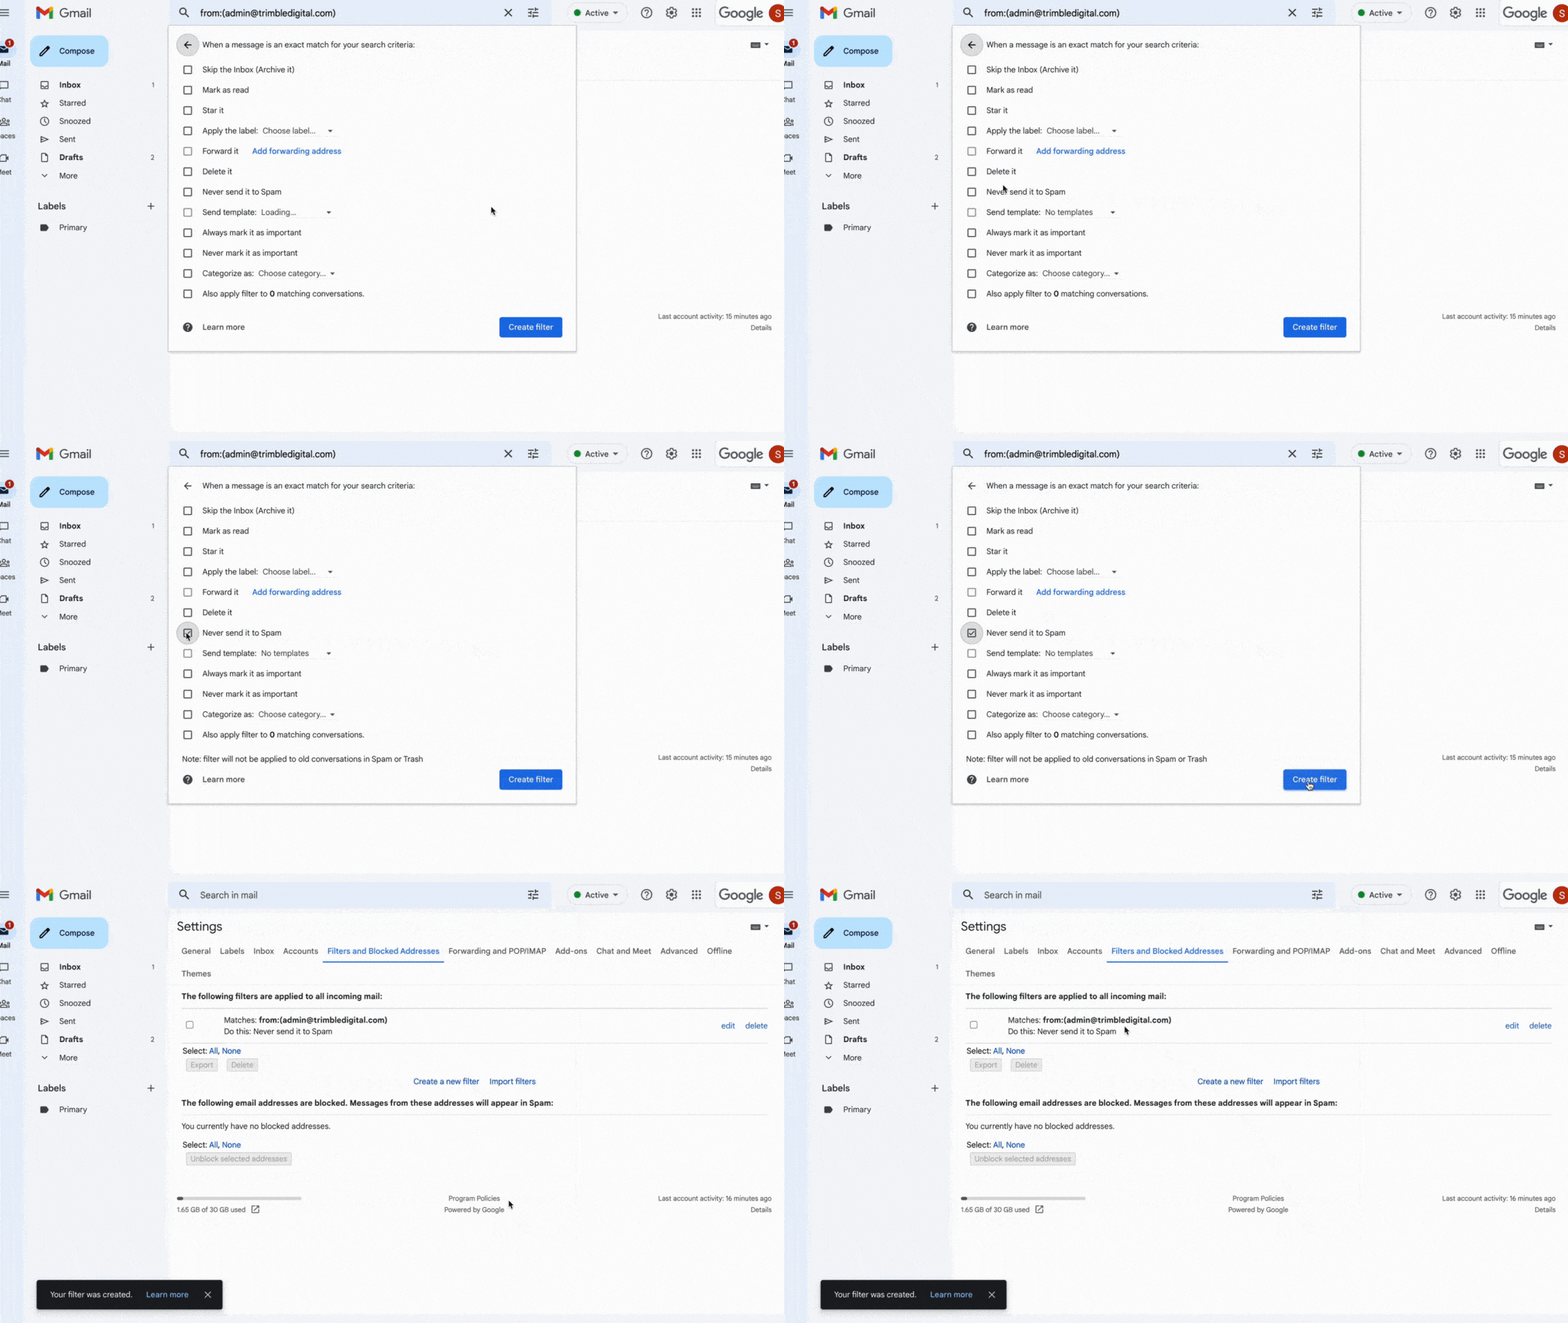
6. Confirm the Whitelisted Email Address
We advise you to double-check and confirm that the email address has been successfully whitelisted. Once you have selected the "create filter" button, you will be redirected back to the settings page. Navigate to the "themes" section and verify which filters have been applied to your email.
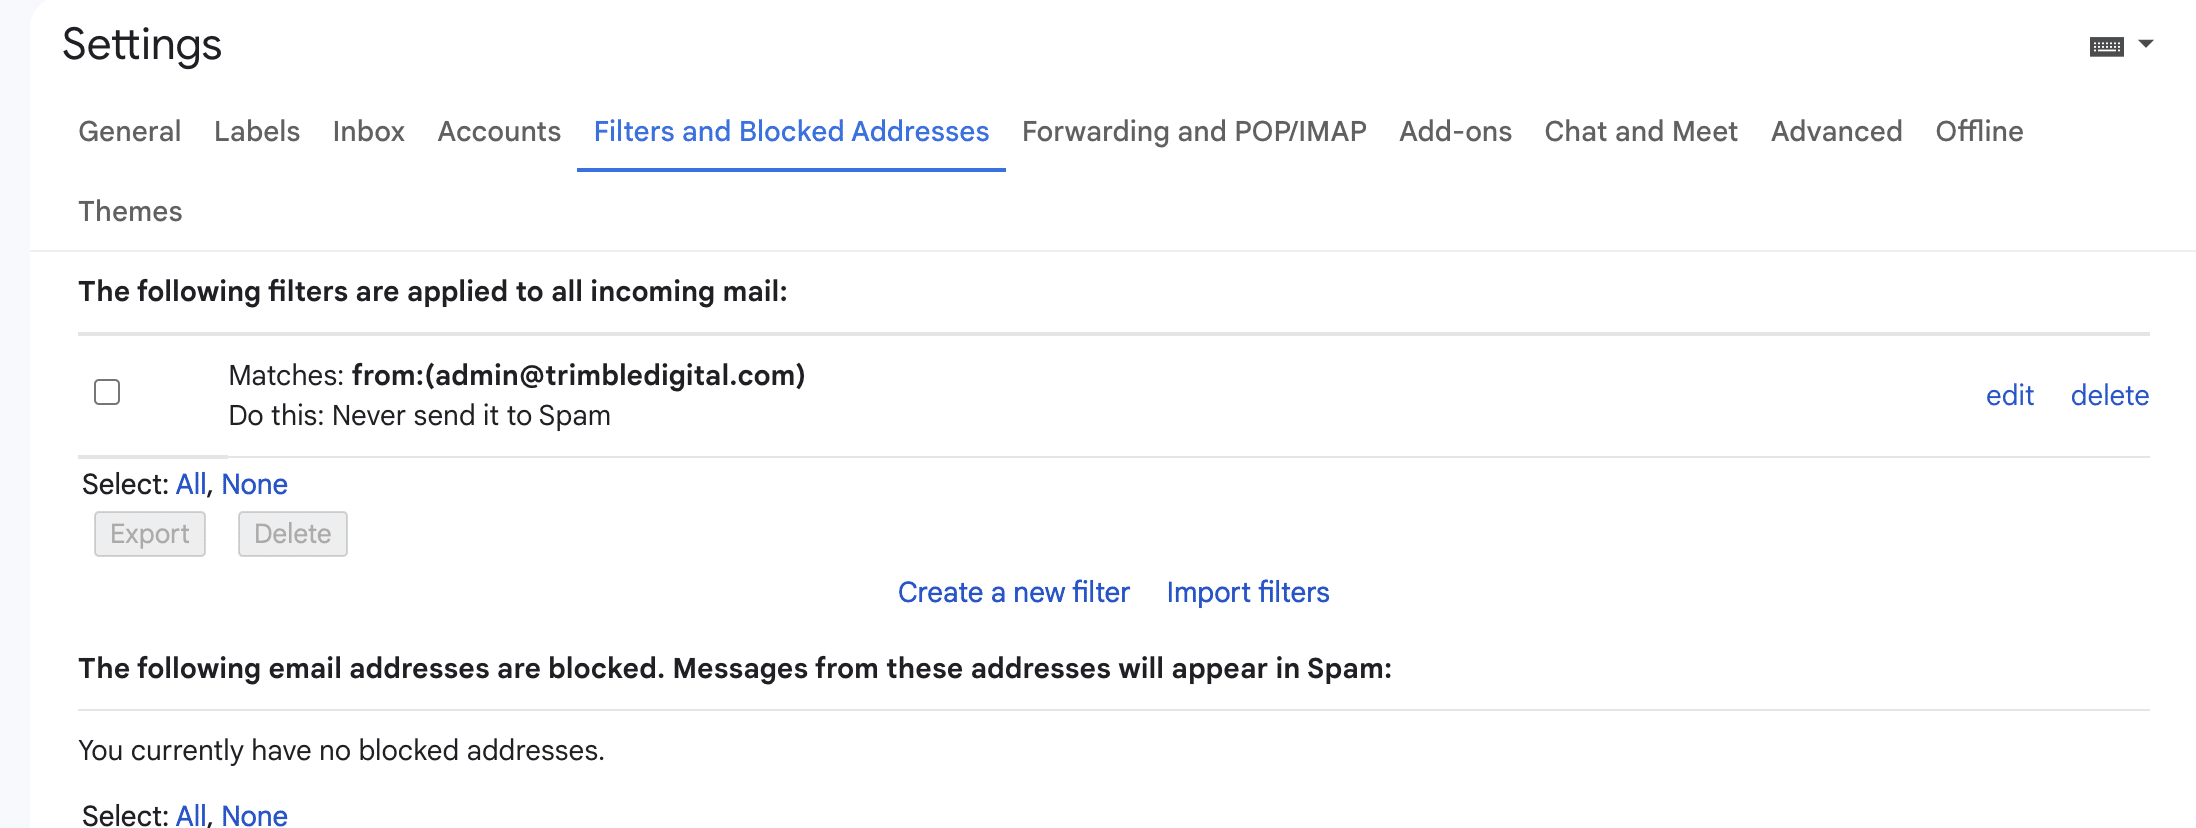
You should observe the email address you whitelisted with the message "Never send it to Spam" located underneath it. And that's all there is to it! Simple and straightforward. Thank you very much!
Outlook
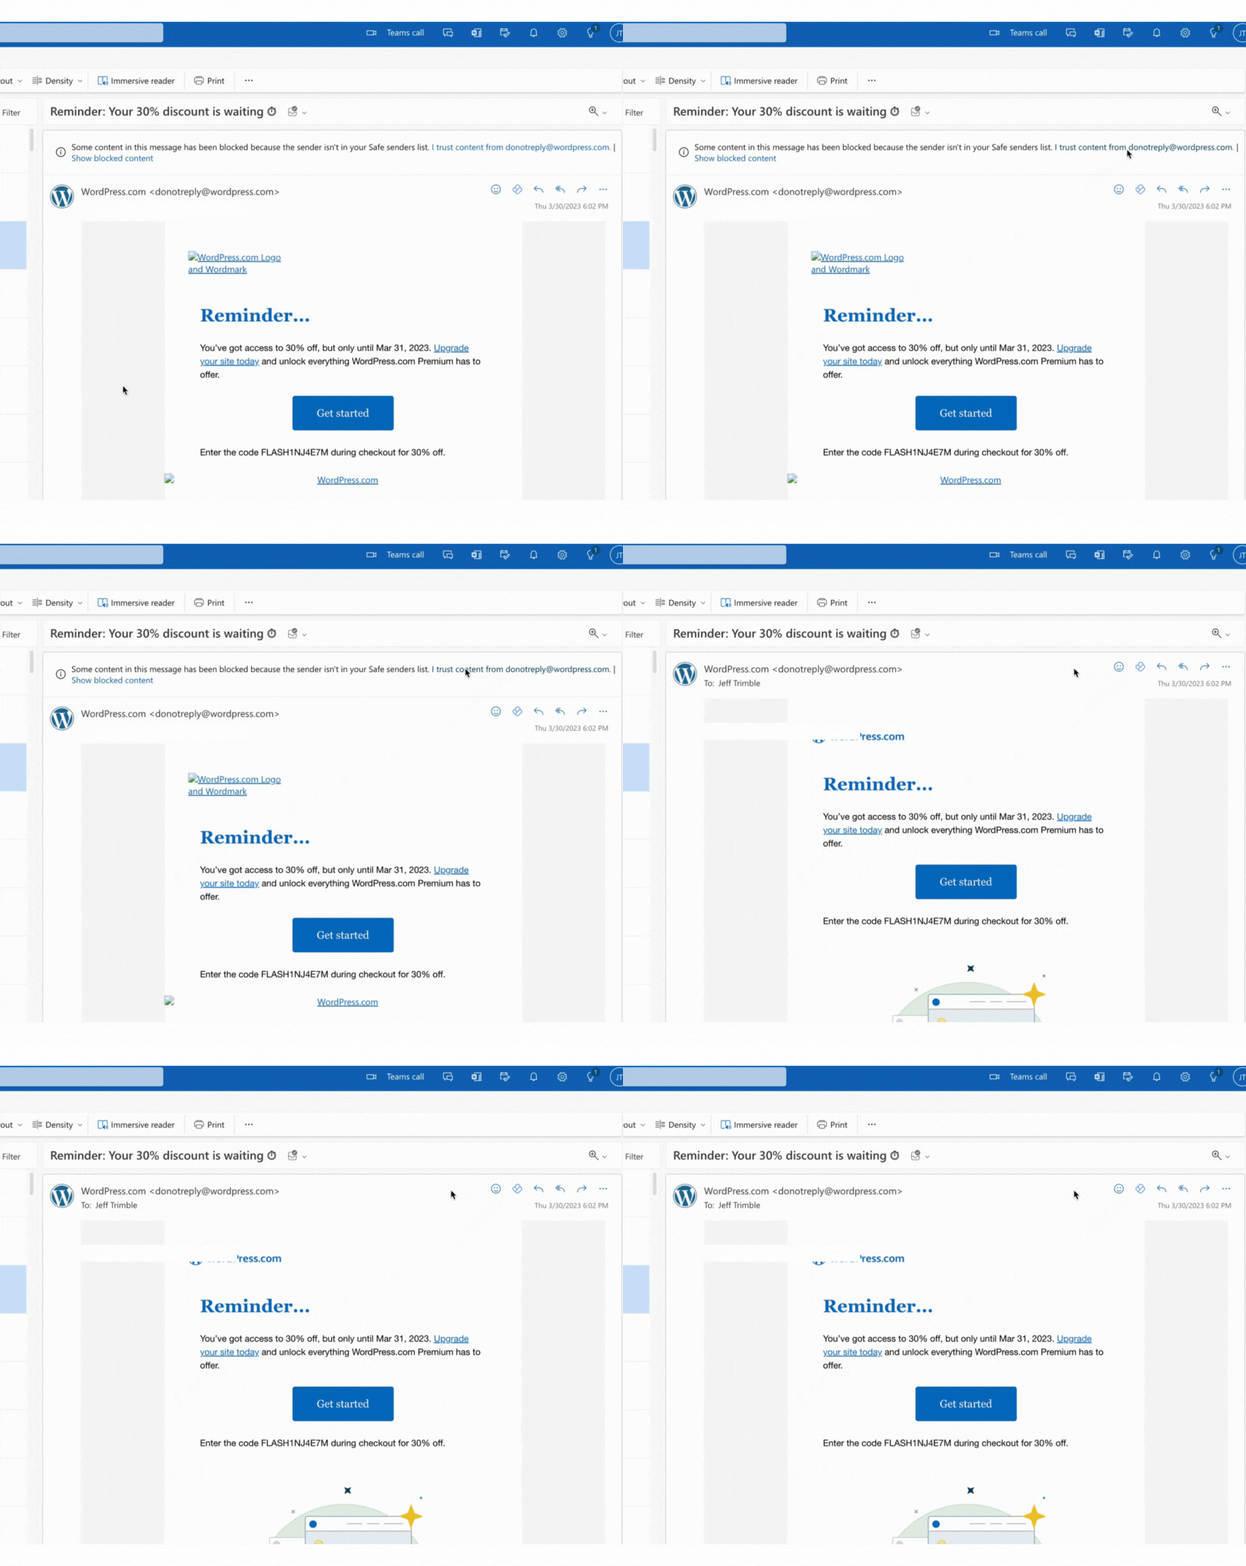
Access the email from the sender that you have whitelisted, and click on the option that reads "I trust sender@domain.com".
How To Whitelist using Mobile (tablet/phone) Email Apps
Gmail
When using the Gmail app, you have two options:
- If an email is in the spam folder, you can mark it as "not spam."
- You can move an email from the secondary inbox to the promotional inbox.
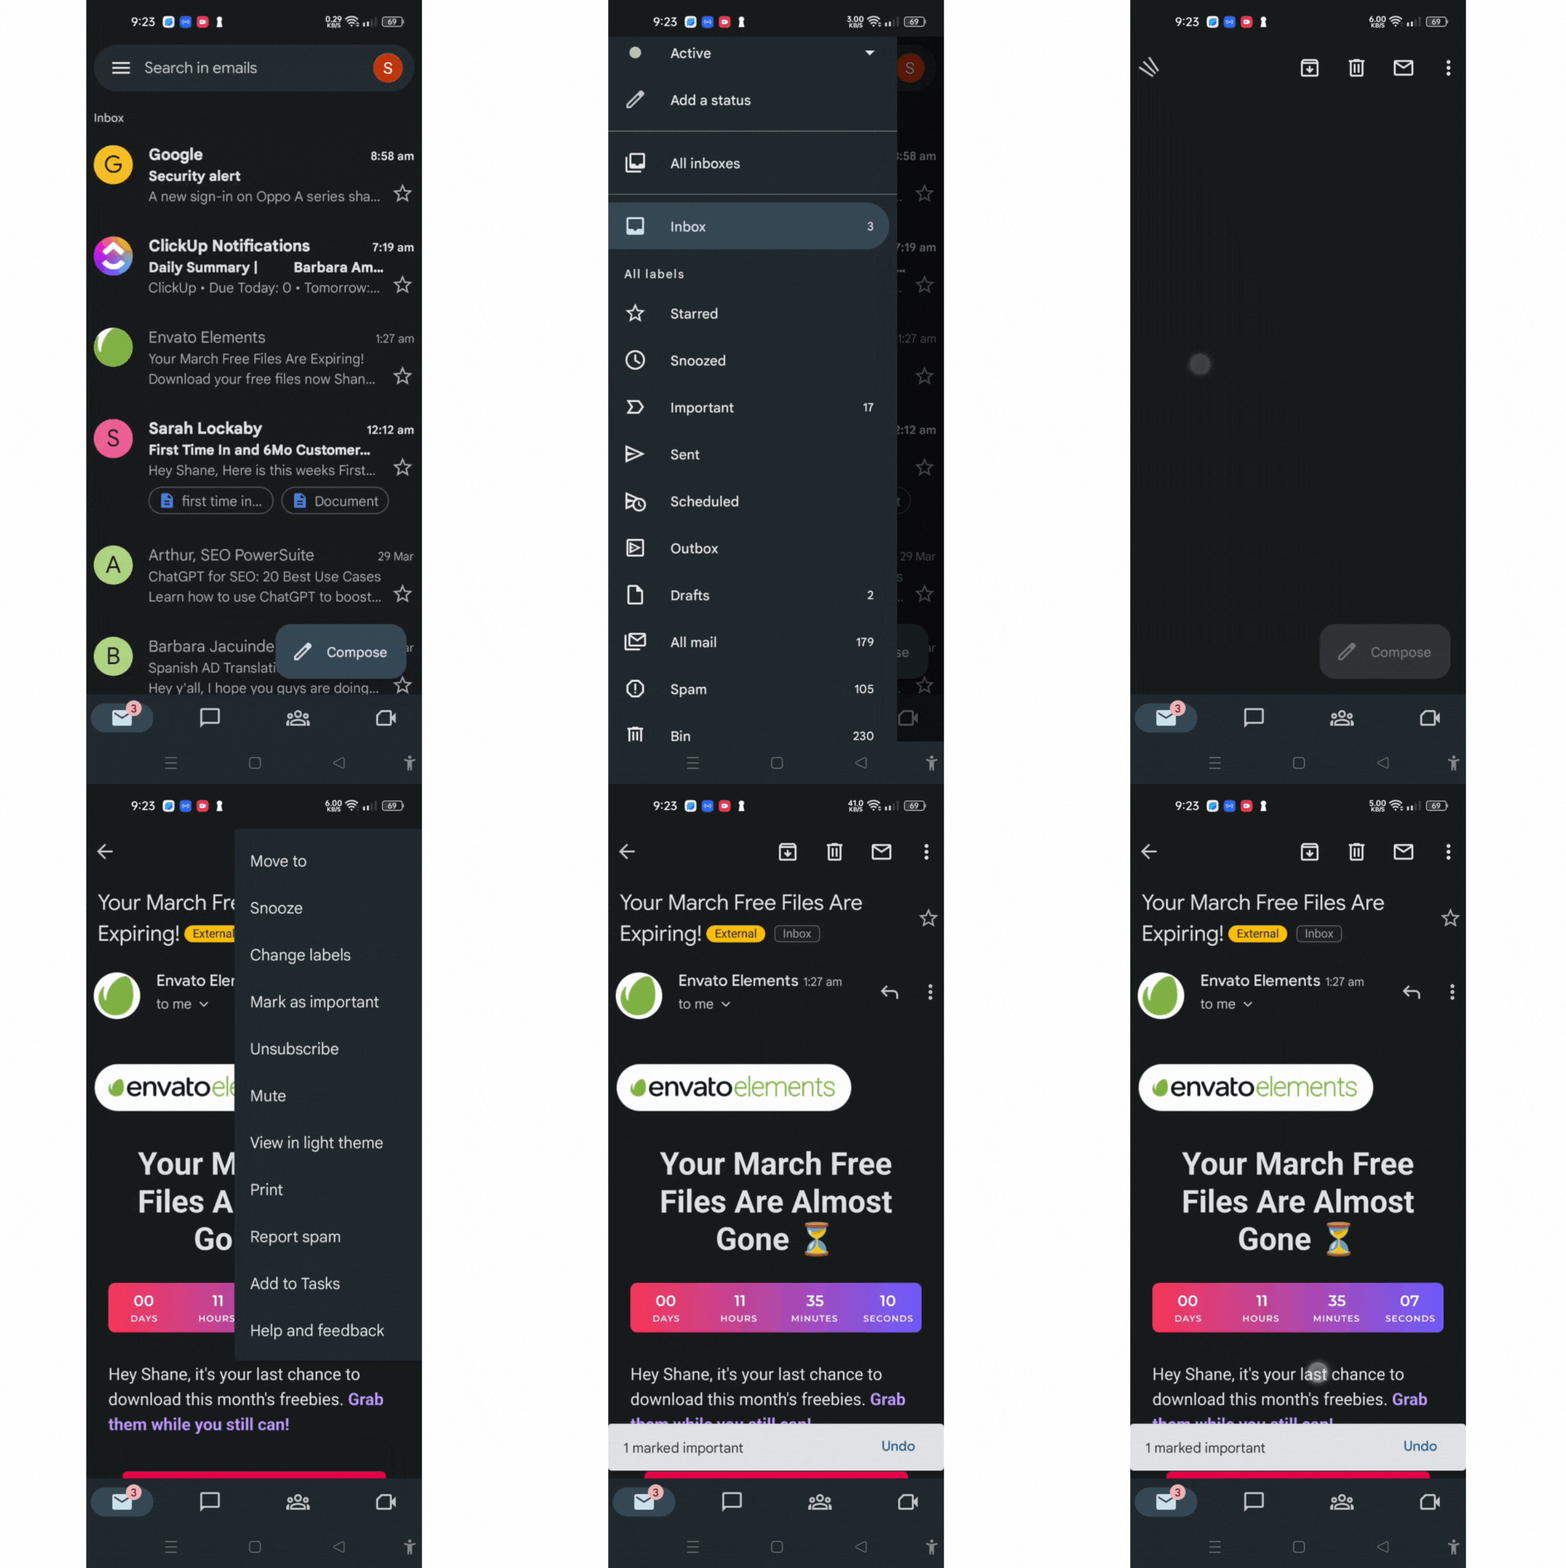
If an email continues to be sorted into the spam folder, you can access it and click "Report not spam." Alternatively, you can prioritize the email by selecting the three dots located in the upper right corner and choosing "Mark important," as demonstrated in the video below.
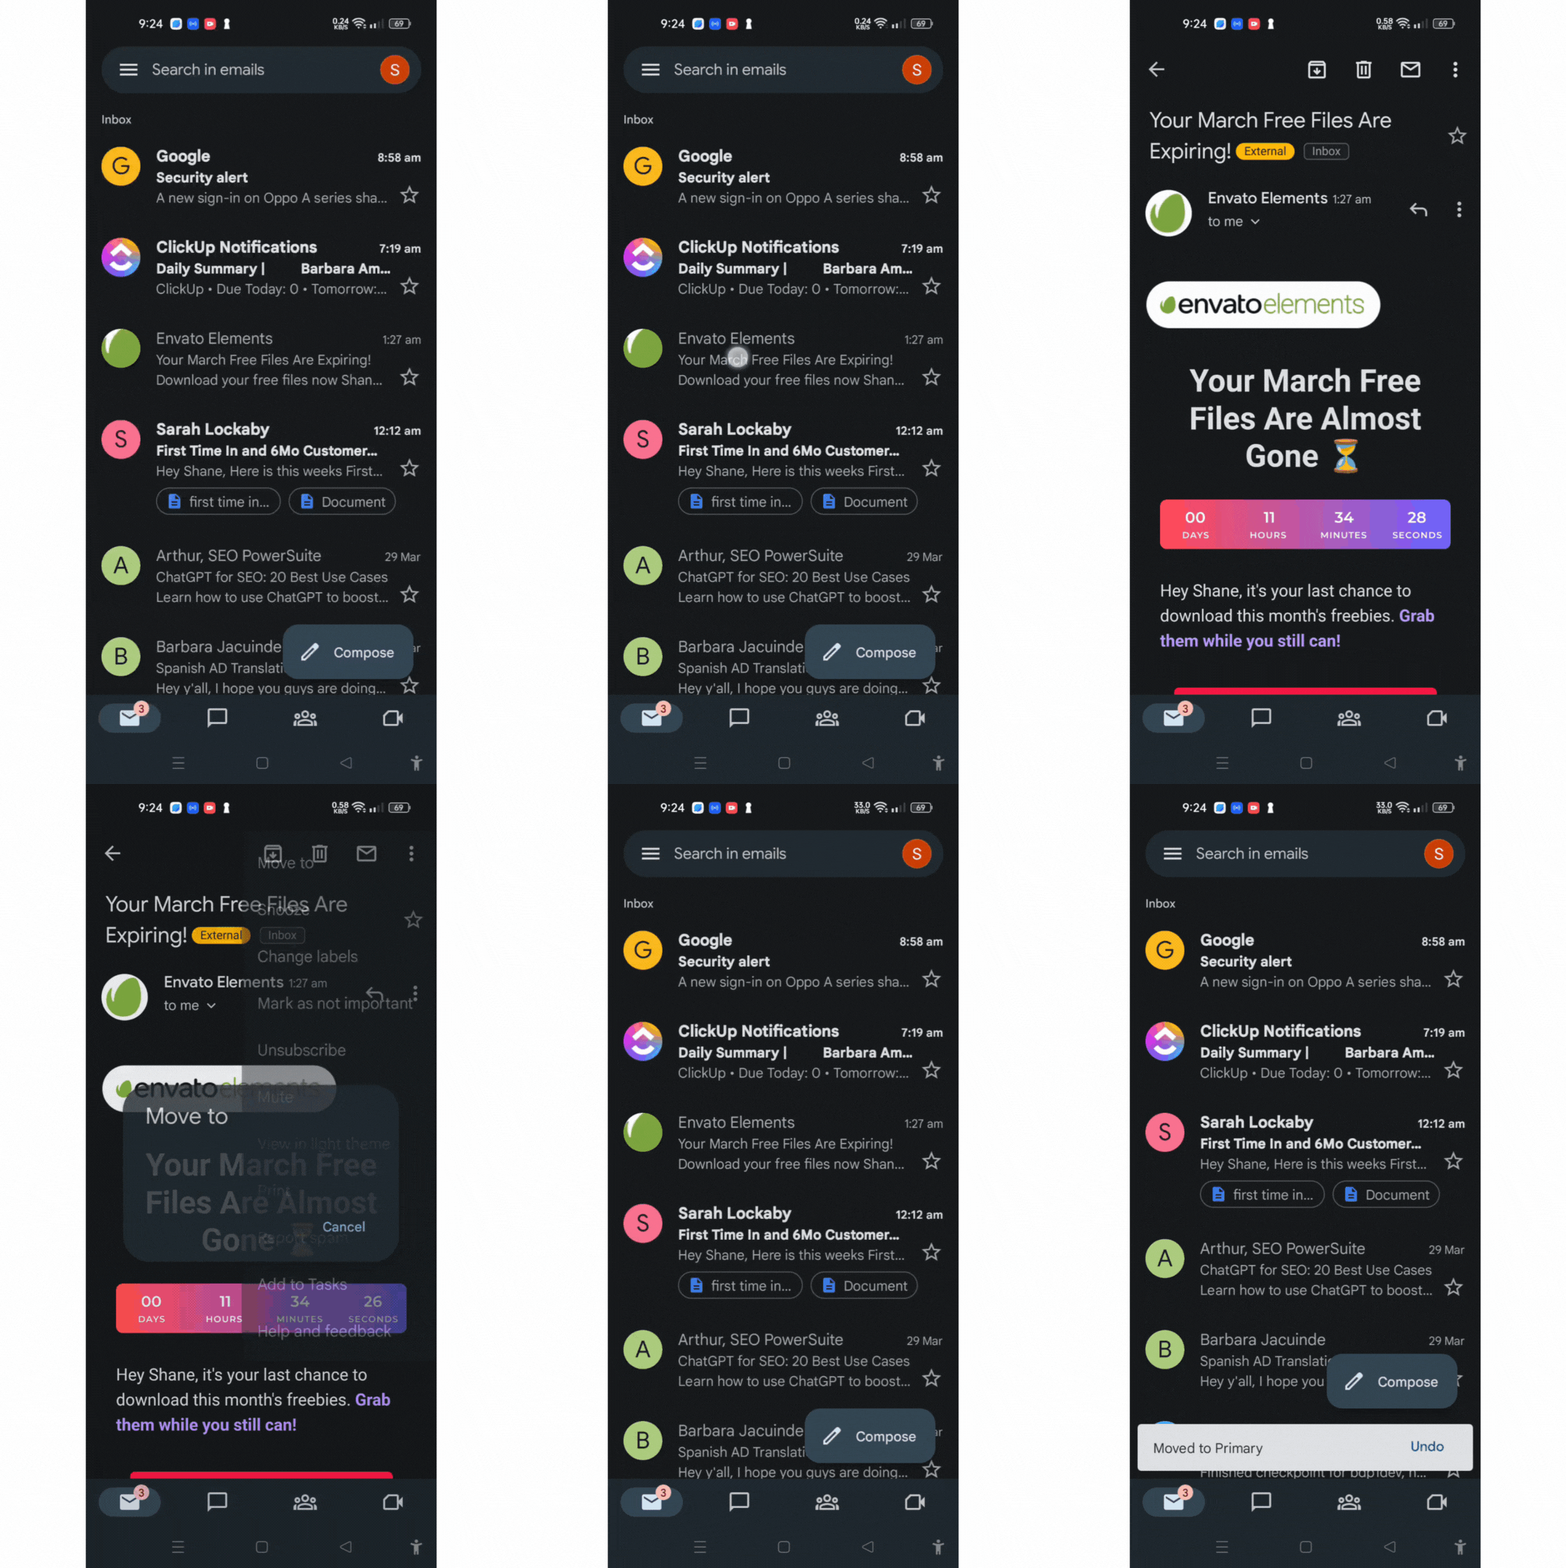
For option two, you can open the email and tap on the three dots located in the top right corner. Then, select "Move to" and choose "Main." This will transfer the email from the promotional folder to your primary inbox.
Outlook Mobile
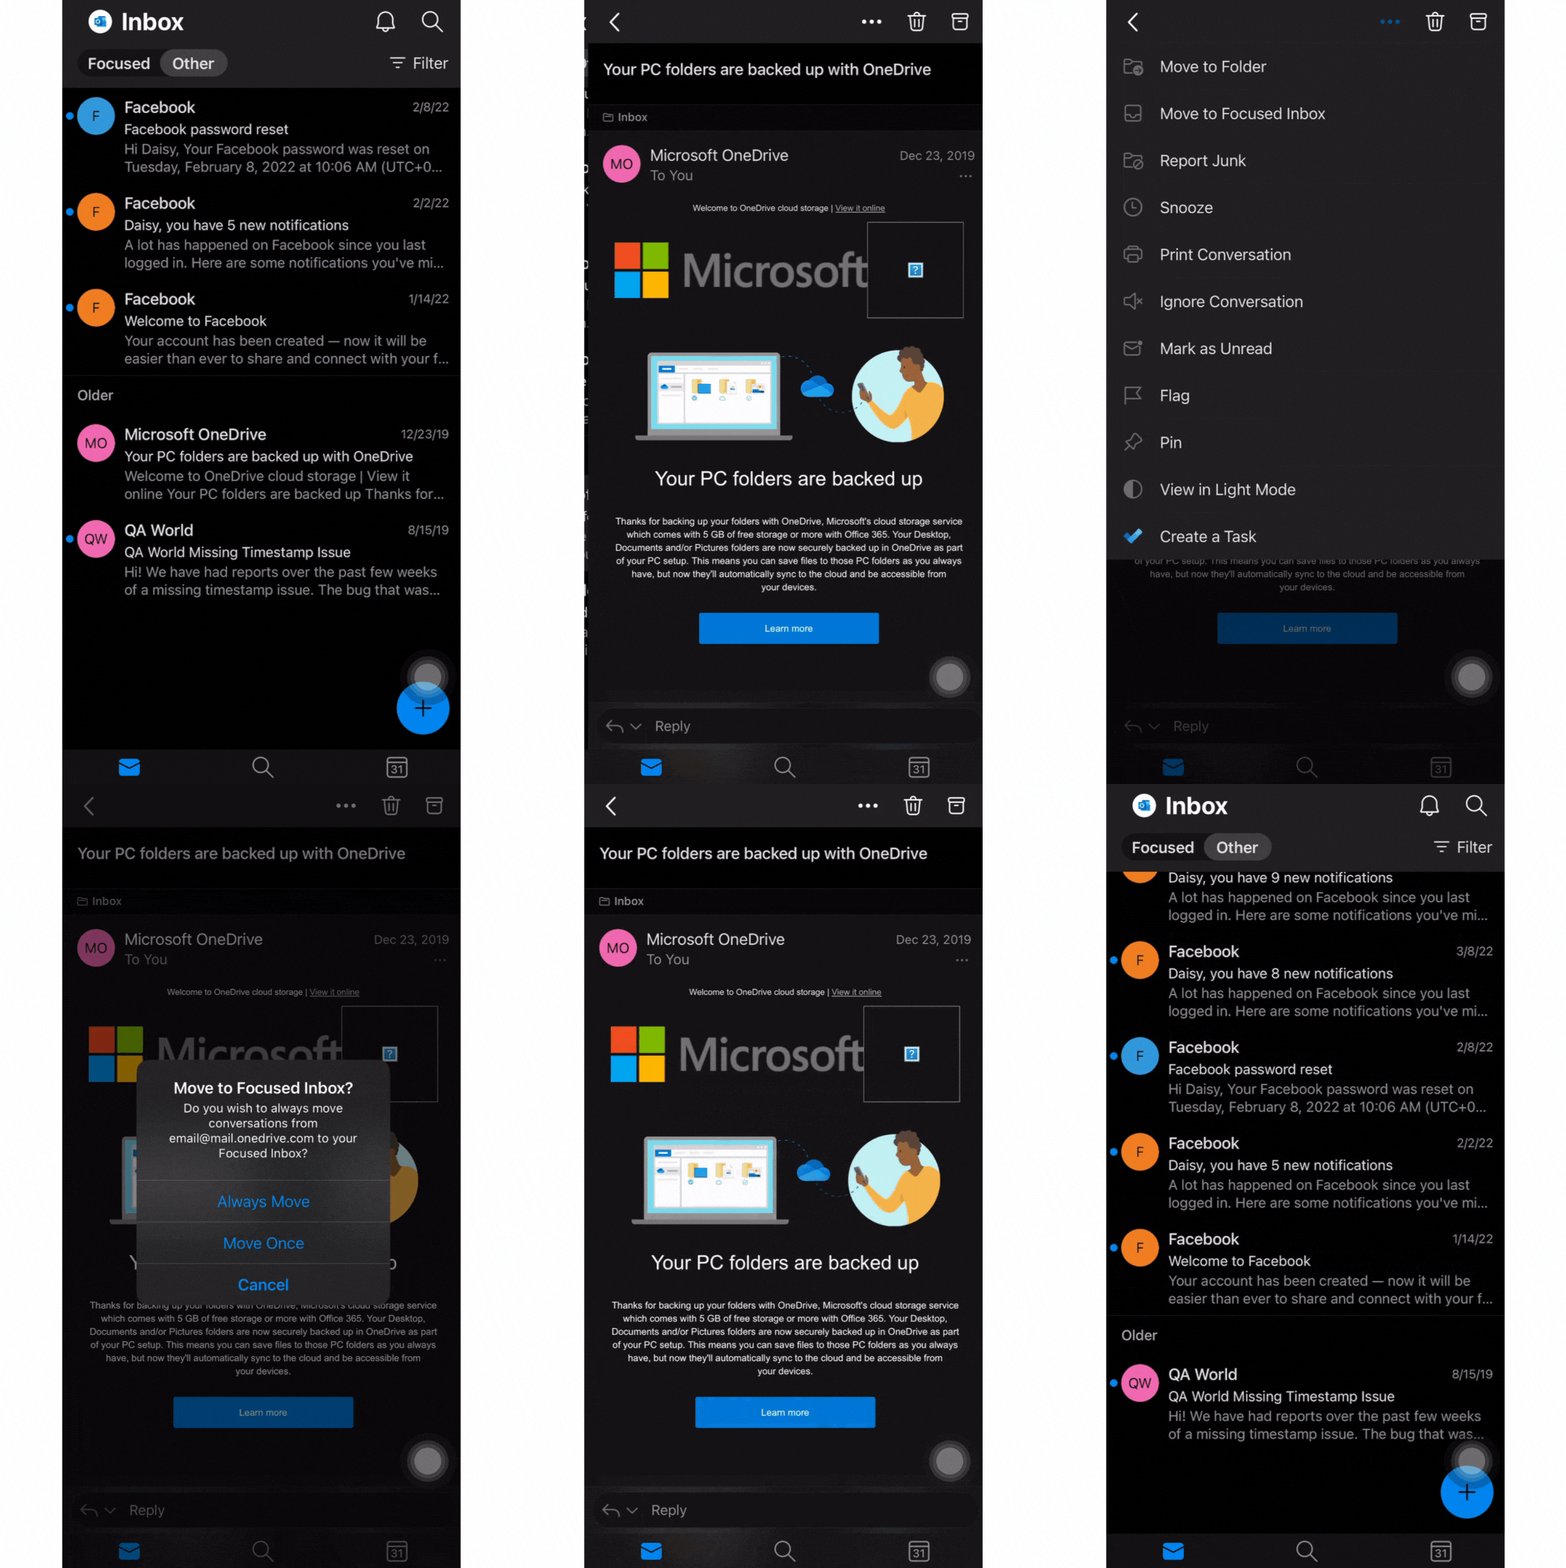
To make certain that you receive important emails on Outlook for mobile, you can add senders to your focused inbox. Follow these steps:
- Access the email that you want to whitelist.
- In the top right corner of the screen, tap on the three dots (not the dots inside the email).
- Select "Move to Focused Inbox."
- Click the "Always Move" button in the popup window.

Get The Local Business Machine, free
The ebook first, free. Then a note from me when I have something worth your time.